
A recent SCA event I attended was sponsoring a series of Laurel Challenges. A Laurel friend of mine posted the following challenge: "This Magic Moment Sponsored by Mistress Katherine. The prize will be given to those persons, who, wittingly or unwittingly, create a moment that magically transports us back in time. It can be a performance, a demonstration of a craft, sitting quietly engrossed in a period activity, or conversing “forsoothly” with a friend. Anyone of any age can win! The prize will be a book of hours."
I offered my services in the creation of the prize. Mistress Katherine came across the a book to use for the prize: Book of Hours ('The De Brailes Hours')
I downloaded a copy of each page and printed them out in approximately the same size as the original book. You can see that the book must have been rebound a few times. Each time they rebound the book the pages were cut smaller and smaller. Many of the illustrations have been crudely chopped off duting the rebinding. The copy of the book I intended to make was a replica of the book as it is today, and not as it would have been when first published. Actually early on in the project I decided to make two books. I planned on using one as the prize and the other would be gifted to the sponsor of the challenge.
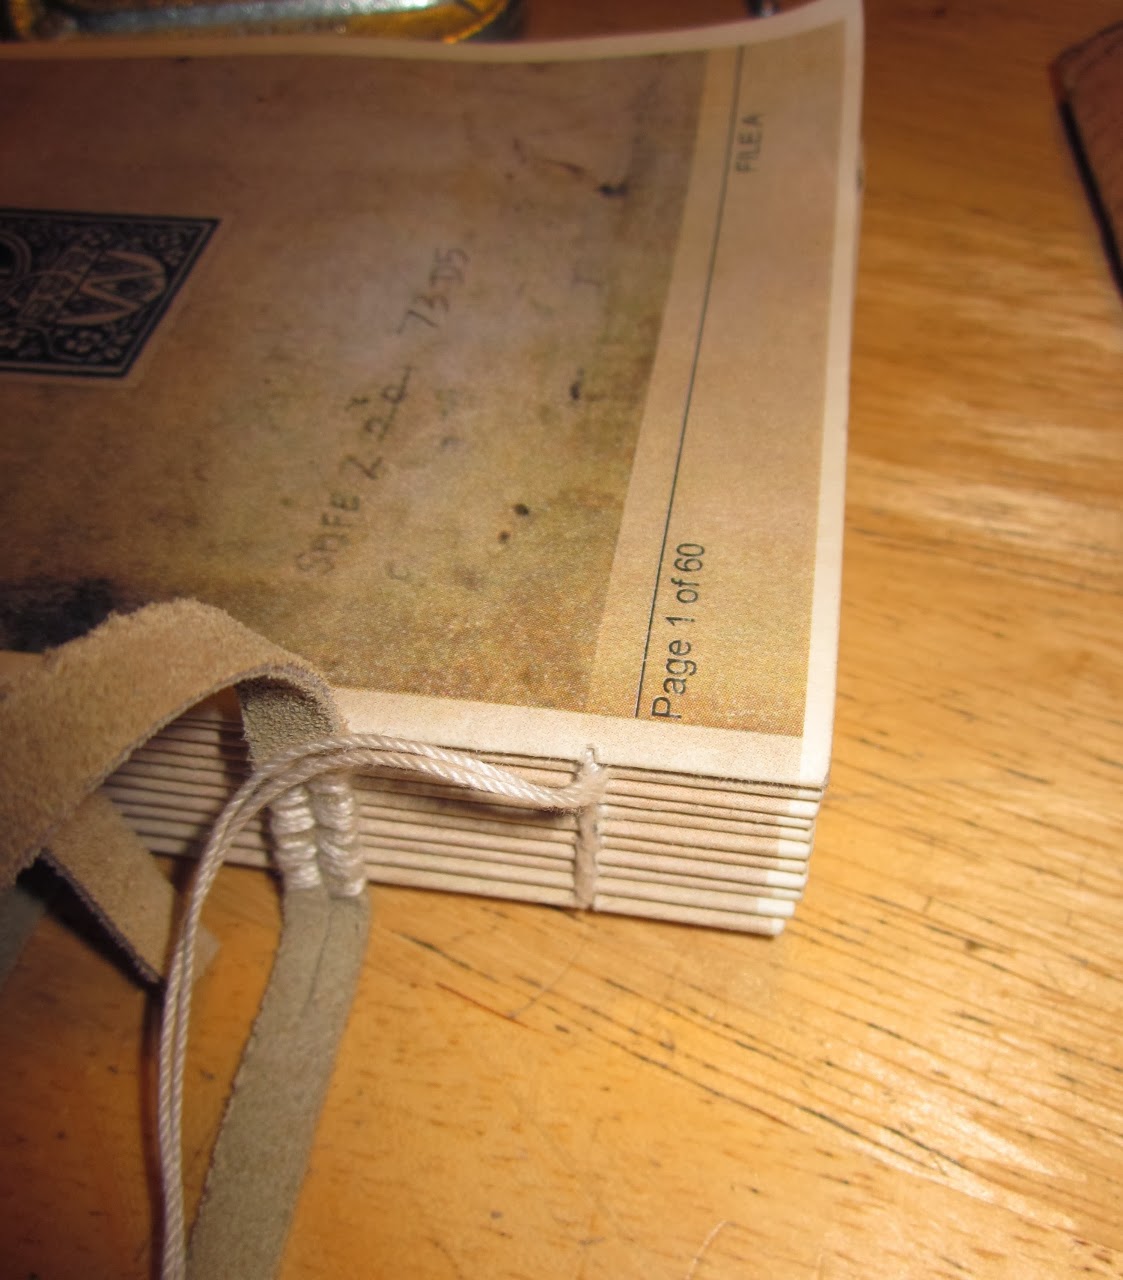
I printed the pages out on an artificial parchment which was only slightly heavier than "normal" copy paper. You may notice that I have left a border around the pages. I did that intentionally so that when the pages were cut they would look more like the original. I also added a footer with page numbers for use in binding. The footer would later be cut off but that help me order the pages correctly as the original images did not have page numbers and were not in a language I could decipher.


After cut and folded I grouped them into enough folios so as to replicate the number of folios in the original. Once folded and gathered together I clamped the folios together so that I could use a small saw to cut a slit along the back for the stitching holes.


The small slit ensures that all the sewing holes are properly aligned. Here is what they look like unclamped and ready for sewing.

The leather thong that I used for the binding was a remnant from a Salvation Army coat used for a previous project. It is about 1/8th in suede leather. The thong was about 1/4 inch wide. I made a small slit in the thong long enough to wrap the thickness of the bound book.

Normally in period I understand that there is a special contraption to hold the pages in place while they are being sewn into place. As of yet I haven't used or even seen one of those in person. I have simply held the folios in my hand and stitched them with a blunted needle point needle. I used a heavy weight cotton string to bind the book to the leather thongs.


I completed the sewing. It was at this point I realized I had a problem. When sewing the folios together you can see three thongs and a running stitch on each end of the book. If you look carefully you will see the problem. Ugh!


When I spaced out the margin to determine where to make the stitching holes I didn't account for the border which I left to be cut off. The border which would need to be cut off to finish the edges. I was in a bit of a rush doing a binding like this for the first time and I made a mistake I couldn't fix. I ended up proceeding with the cutting anyway.


Here you can see the cut folios. I used the cut book to determine how large the cover would need to be. I used 1/4 inch oak planks for the covers.


Here you can see a close up of the issue I was speaking of. When the folios were cut, a portion of the sewing was cut as well. I tried to fix this by running another set of stitching only on the one end of the book. It hides the mistake rather well and will hold together but doesn't look quite as nice as I would like.

I was making two books at the same time. I was able to adjust my cutting line on the second book so that I didn't have to cut the stitching. Only one of the two books had to be "repaired".


Booth books cut and ready for covers. I used the location of the thongs to mark the placement of the holes I would need to carve in the oak planks. I ended up "cheating" and using a power tool for this part. Too little time and too much stress. I used my Dremel to clean up the holes for the thongs.


Here you can see the cut holes. The enter the edge and come out the face of the plank. A second set of holes were then cut through to feed the thongs through. Once in place and covered with the leather cover the holes would be sufficiently hidden.


Cut glued and ready for pressing. I put a spot of glue in each hole and then covered each surface with a sheet of waxed paper to protect against run-out. I then placed the books in a stack with a 20 pound weight on them to dry over night.


Here is the glue that I used for attaching the leather to the oak planks.

I cut a piece of leather from a sleeve of another Salvation Army coat. I cut a piece of leather large enough to wrap around the edges.


I glued the leather in place, wrapped the edges and then placed another square of leather on the inside of each cover. I didn't any pictures of this step in progress as I was in a rush to get things pressed before the glue set.
Here you see a stack of some of my books I had lying around. Due to poor planning I ended up using these to press the covers until dry. I quickly scrambled to find a weight and these books were on the coffee table.


The finished books. Once the leather covers were dry I glued the first page and last page of each folio to the planks to hide the binding holes.


This may be silly, but this was my proudest moment of the entire project. One of my daughters often likes to sit and watch me as I do my crazy crafts. She quietly watched and then disappeared. She came back with some paper, a stapler and her box of duct tape. She loves making things out of duct tape!
She sat across from me and started making a book of her own. She cut and stapled some pages together and then made a duct tape cover for the book. The fact that she wanted to sit and copy me made me about the proudest Papa in the world!!!


